Saturday, April 28, 2012

PB&B Cookies

I will start this with two truths.

1. I am shamelessly stealing this from another blog A Cozy Kitchen.
2. I am officially in love with that blog! Amazing!!!

You should go there, read her blog, and try a new recipe.

So we're going to a Crawfish Boil at my sister's house and we figured we should bring something. So we like to bring sweets. I think it's what we do best. It also means that my sister and my family will most likely consume all the sweets. Her beautiful little girls and husbands are not big on sweets.

And these puppies are sweet. Sweet and savory. Are you ready for Peanut Butter and Bacon Cookies?

They are really good and chewy. Yum! And Chef Steve really liked them too!

What you'll need:

Ingredients:

8 slices of bacon
1 cup organic peanut butter
1 1/2 cup sugar, divided
2 tsp of molasses
1 egg
2 tsp of baking soda
generous pinch of fresh ground nutmeg
1/2 cup of coarsely chopped roasted salted peanuts (or honey roasted peanuts)

Stuff you'll need:

Electric mixer
Large mixing bowl
spatula
2 cookie sheets
parchment paper
foil

Let's start by getting your oven ready, place a rack in the upper third of the oven and preheat to 350F.

Line a baking sheet with foil and place the bacon slices in a single layer. Bake 12 to 15 minutes, or until crisp.

Remove the bacon from the oven (keep the oven on),


Let the bacon cool slightly, then transfer to paper towels to finish cooling.

Coarsely chop the bacon and set aside.

Line a clean cookie sheet with parchment paper and set aside.

Put the peanut butter, 1 cup of the sugar, and the molasses in the mixing bowl

Use the electric mixer to make mix to a creamy texture, about 3 minutes. The blog suggested that you use a spatula attachment for the mixer. We don't own that, so we improvised and used our regular mixer and a spatula to scrape off the mixer when needed.

Add the egg, baking soda, and nutmeg and mix on medium speed for another 2 minutes.


Use a sturdy spoon to fold in the bacon and peanuts.
Roll the dough into large walnut-sized balls and roll in the remaining 1/2 cup granulated sugar.

Place on a lined cookie sheet.

Use a fork to make that distinctive peanut butter cookie crisscross patter. If the cookie dough begins to stick to the fork, dip it in sugar before pressing into cookie. Dough will be a little crumbly just press together with your fingers as necessary.

Bake for 10 minutes, until lightly browned. Cool on the baking sheet for 5 minutes before transferring to a wire rack to cool completely.

Cookies will be crumbly and delicious. Cookies will last up to 5 days in an airtight container in the refrigerator.

Wow. They're good! But I feel like I'm going to have a heart attack just nibbling on these yummy morsels.

Ryan, "Uhhhh."

"Tank ooo."

I truly do love my family. :)

Paints and Plants


So I know I haven't blogged in awhile, But in my defense, I do have two toddlers to keep up with. But most importantly, the weather has been amazing and it would be a crime to spend a large amount of time inside. However, I woke up early today, so I figured now is a good time to get back on here.I did post some pictures of our outside adventures (Eisenhower Park, Duessen Park, the zoo!) Later I'll post a recipe for some button biscuits that my little ones love to snack on or have with honey for breakfast. But for now I'm just going to give you all an update on the Blackheart Garden.


These pictures are from last week. The sun hasn't surfaced as of yet, so I'm unable to get hot off the presses pictures. But you can see, we're making progress.


That's a Roma Tomato. They're about the size of a racket ball and the very first one starting turning red yesterday.

Questions to all you gardeners out there: I hear birds and caterpillars will come to eat my tomatoes. I haven't seen any signs of this happening? Am I just lucky?

Ok, the strawberries were doing amazing, and I think we were about a week off before being able to harvest our first few strawberries. However, Rose got excited and picked out six biggest strawberries, so it might be a little longer.
Remember these pictures were from last week.

The green beans are doing well. But they are producing many beans. Weird.
My green peppers are flowering but not much else, and my cucumber is trying to dominate the rest of the garden. Very annoying. All the herbs are doing well, and I'm excited about what to next in the front garden.

Sunday, April 1, 2012

Lovely Lemon Cake

There's something about spring that screams desserts! This makes no sense, because we should all be trimming down for the summer months of shorts and bathing suits, but who cares. I love lemon flavored desserts, only to be topped by strawberry cake. But, I'm the only person in my family who feels this way. However, I'm making the cake, so I get to choose. This cake was so good. And even if you don't like lemon flavored cake you can use the yellow cake recipe with some other type of icing to make it non-lemon.

What you'll need:

NOTE: Take your butter and eggs out now or earlier than now, they should be at room temperature when starting the recipe. This will make things much easier and the cake will come out better.

Ingredients:

Cake
1 cup butter (2 sticks)
2 1/2 cups all purpose flour
1 1/2 tsp baking powder
1/4 baking soda
1/2 tsp kosher salt
2 tsp pure vanilla
3 large eggs
1 cup whole milk

Icing
2 cups unsalted butter (4 sticks)
1 lb confectioner's sugar (about 3 1/4 cups)
2 tbsp finely grated lemon zest
pinch of salt

Optional

Candied Lemons
3/4 cup of sugar
3/4 cup of water
1 thinly sliced lemon

Baking Tools:

2- 9" round baking pans
parchment paper
pen or pencil
scissors
small bowl
3 large bowls
Electric mixer
large spatula
whisk
toothpicks
cooling racks

Optional
small sauce pan
colander

Now for some direction


Prep your pans:
Mark the bottom of your pan
Cut the parchment paper to fit inside your pan

Butter your pan

Place the parchment paper inside the pan and butter the paper
Dust with flour, tapping out the excess

In a medium to large bowl, whisk together flour, baking powder, baking soda, and salt. Set aside.

Using an electric mixer, beat the butter and sugar on medium-high until fluffy (2-3 minutes)

Beat in the vanilla
Beat in the eggs one at a time scrapping down the side as necessary

Reduce the mixer speed and add a third of the flour
Then add half of the milk, then 2nd third of flour, then rest of milk, then the rest of the flour
Do this slowly and make sure everything mixes in before going to the next step

Transfer the batter evenly into the prepared pans.


For 9" pans bake for 22-25 minutes (2-8": 25-30 minutes,1-9X13" 25-30 minutes)
Stick a toothpick in the cake's middle to make sure it's done.

Remove from oven and cool in the pan for 15 minutes

Then place on cooling racks until they are completely cool
 Note: If you cool the cakes upside down it will make them flatter, easier to stack

The filling:
I just used store bought lemon curd, I have a recipe but it take 2 1/2 hours

The icing:

Lemon icing

2 cups unsalted butter (4 sticks)
1 lb confectioner's sugar (about 3 1/4 cups)
2 tbsp finely grated lemon zest
pinch of salt

Using the electric mixer, beat the butter on high until light and fluffy (3-5 minutes)
Add lemon zest

Reduce the mixer speed to low and gradually add sugar
(At this point if you were going to make vanilla icing, don't add the lemon zest and add 1tsp of vanilla extract.)

Add a pinch of salt and beat until smooth

Candied lemons

In a small sauce pan bring 3/4 cup and 3/4 sugar to a boil
Slice the lemon very thin add to the boiling suga' water
Reduce heat and let simmer 5-7 minutes
Drain and let cool on cooling rack until completely cool

Putting it all together:

I wasn't trying to be all fancy with this, but if I was, I would use a cake plate and place wax paper pieces underneath the cake to prevent getting icing on the plate.

Place bottom cake on plate, spread lemon curd (or icing if you want) onto top of cake

Place second cake on top of the first layer.

Make sure the cake is flat and get ready to apply the icing

Place large dabs of icing. It's important to cover the cake first and make it pretty, second.

Place candied lemons on top.

It doesn't look that pretty, but it was delicious.

Next time I'll have to make another type of cake because no one really likes lemon cake, but me. Chef Blackheart said he loved it... for lemon cake. Granny had about the same reaction. I thought it was great. Ryan thought it was amazing as well. Well, she is my daughter!

Good luck with your baking!


Sargent Pepper Jelly

Apparently my hubby has gotten this canning thing down. Good for him, good for us. Who needs smuckers jam and jellies, we can do it ourselves!

We really had no plans of baking or cooking this weekend; however, that all changed when I got called into work yesterday. I had taken the trip into town once already to ensure all my lovely little science projects were alive and ticking. All was well! And as I lay on the floor with Ryan talking to Chef Blackheart how we were going to spend this beautiful day, I got the call. Ugh, power outage. Thank you Centerpoint for ruining my Saturday, off to work I go, again. At this point I do not want to make another forty five mile trip by myself and force the family to join me in my trek to town. This is what I get for moving to the burbs. Luckily nothing was harmed too much and I was out of there in a jiff. Now what? We start going towards Target to burn some gift cards on little girl socks. On our route to Target is the Farmer's Market. Now we are stuck at this light forever, and decide we should pop in to get some strawberries for a new batch of jam. Somehow this is seamless. We find a parking spot quickly, the girls are happy to go, and our only downfall is that we don't have any of our bags. Also walking up we see our friends Josh and Donna. How lovely! One question guys, how to do you look so good in work out clothes? I don't get it, but it was great seeing you. Maybe sometime we should actually plan a trip to the farmers market so we can hang out for more than 2 minutes.

Back on track. In this trip we talked about buying some peppers for canning. In my head I was seeing candied jalapenos, Chef Blackheart had jam on the brain. Unfortunately, no one had peppers, so we had to get those from our favorite market, HEB. Although I had something else in mind, I can't wait to try the jam. Can't try it yet, but it smelled and looks amazing.


Things you will need:


Ingredients:


1 1/2 cups cranberry juice (not low calorie)
1 cup vinegar
2-4 fresh jalapeno chile peppers, halved
5 cups sugar
1/2 of a 6-oz pkg of liquid fruit pectin


Cookware:
medium sauce pan with lid
sieve
measuring cup
6 quart heavy kettle
large spoon
ladle


Canning items needed (We are just using the boiling method, we don't own a canner):


extra large pot
medium pot
canning tongs
water


Let's jam!(I know, I'm a dork.)


Clean 5 half pints canning jars. Sterilize when finished. Make sure you have enough tops.
In the medium sauce pan combine cranberry juice and vinegar
Half the jalapenos and place in the cranberry vinegar mixture

Bring to a boil, reduce heat
Simmer covered for 10 minutes
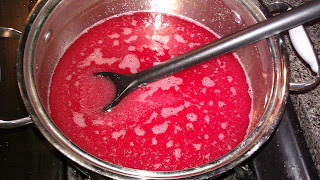
Strain mixture through a sieve into a large bowl. (We don't have a sieve so Boyscout Blackheart made a sieve out of a colander lined with a coffee filter. It worked!)
Press with a back of a spoon to remove all liquid from the peppers. Discard peppers
In the 6-quart kettle, combine 2 cups of the liquid and the sugar
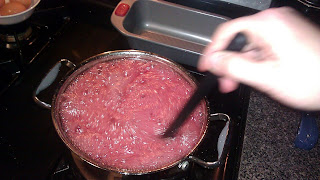
 Bring to a full rolling boil over high heat, stirring constantly
Quickly stir in pectin
Return to full boil, boil for 1 minute, stirring constantly
Remove from heat
Skim off foam
Ladle at once into hot sterilized half pint canning jars, leaving a 1/4" headspace


Wipe the rims, adjust lids, process in a boiling water canner for 5 minutes (start timing when the water returns to boil)

Remove jars and cool on a wire rack until set (2-3 days)

Large pot canning instructions for Ball Canning Jars and Lids


What you'll need:


extra large pot
medium pot
canning tongs
water


1. Boil water in both the extra large pot and the medium pot


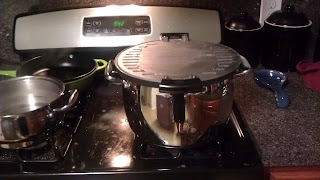
2. Place jars into the extra large pot of boiling water. If the water doesn't cover the jars by about 1" add water from the medium pot to get the water to the correct height.

3. Place "lid on the pot with jars

4. Let it process for 5 minutes

5. Remove with canning tongs

6. Let them cool on a rack. (We let them cool overnight.)


Wait for the pop!