A couple of weeks ago we had ventured into town to go to the Farmer's Market off Richmond (in between Kirby and Buffalo Speedway.) This had been after two weekend trip to other so called farmer's markets that really weren't farmer's markets at all. We were buying something! Anything! We actually bought a lot. But we got sucked into buying three jar of jellies. Now the pumpkin jam was amazing, but the others were sub par.
Now Chef Blackheart, in his OCD, checked the label to see if there were only natural ingredients. Preservatives! On no! High fructose syrup! Not in my kiddos' jelly! And so in the middle of the night, last night, Chef Blackheart became the Grape Jelly King.
We used the Better Homes and Gardens recipe and Ball canning jars. It was not that easy. Mostly the peeling of grapes was the large time consumer, but if you ask Chef Steve, it was so worth it.
Grape Jam Recipe:
Ingredients:
2 lbs Dark Grapes 1 cups water 2 1/4 cups table sugar
Tools needed:
Recipe:
Colander 10 quart kettle or pot with lid paring knife measuring cup metal spoon sieve ladle
Canning: Large Pot with lid or boiling water cannery 3 (8 oz) mason jars with lids canning prongs and de-bubbler (optional)
Is everyone ready to make some jam!?
First things first, wash hands, wash grapes.
Then start the fun process of peeling the skins off half the grapes. Save your skins for later.
Glad it was him not me... I know I'm rotten.
Now in the 8-10 quart kettle, combine the skinned and unskinned grapes.
Cook for 10 minutes or until very soft
Press grapes through a sieve. (we don't own a sieve, so we just used our colander, it seem to work well enough.) Catch the strained pulp.
Chunk the cooked skins and the seeds (if you use grapes with seeds.)
Measure 1 1/2 cups of strained pulp. Return to the kettle.
Cook covered for 10 minutes Uncover and stir in the sugar (2 1/4 cups)
Bring mixture to a full boil Start boiling the water boiling cannery or a large pot with lid. (Enough water to have about an 1" of water over the jar when placed in the water.)
Boil uncovered for 12 minutes or until mixture sheets off a metal spoon
Remove kettle from heat and quickly skim off foam with a metal spoon. (We were exhausted at this point, considering it was midnight and our bedtime is 8:30 pm. So we're missing pretty much the rest of the photos.)
Ladle the jelly into sterilized 1/2 pint canning jars.
Leave 1/4" headspace in the jar.
Use the de-bubbler to get most of the air out of the mixture.
Wipe jar rims and adjust lids to hand tight.
Place the canning jars into the large pot with lid.
We broke our extra-large lid, so we used a George Foreman Grill attachment. Improvise!
Let the jars sit in the water boiling cannery or large pot for 5 minutes (start timing when the water begins to boil again.)
Remove with the canning tongs.
Let cans cool on wire until they set. (We just let them sit overnight.)
If they don't seal, put them in the fridge and use right away.
Ours set, even just using the large pot. :)
Enjoy your homemade jelly!
Rose loved it! Ryan loved it too, but Chef Blackheart took that pic, so I haven't been able to upload it yet.
When Chef Blackheart told me he was going to make homemade burgers, this is what I imagined Rose and Ryan were going to say, without saying.
HILARIOUS!
Ok, ok. Back to giving recipes, I promise.
What you'll need:
Bread Buns
Ingredients:
1 cup water
2 tbsp butter
1 large egg
3 1/4 cups unbleached all-purpose flour
1/4 cup sugar
1 tsp salt
1 tbsp instant yeast
1 tsp onion powder
Olive oil for greasing pan
Tools Needed:
Electric mixer
(2) Large bowls
Spatula
Cutting Board (optional)
Clean towel
Baking sheet
House Seasoning (Thank you Paula Dean)
Ingredients:
1 cup salt
1/4 cup black pepper
1/4 cup garlic powder
Tools Needed:
Plastic bag (small)
Sharpie
Burgers
Ingredients:
1 lb grass-fed ground beef
1tbs "House Seasoning" (salt, pepper, and garlic powder mixture)
Tools Needed:
Grill
Thermometer (optional)
Blue Cheese Butter
Ingredients:
1/4 cup Blue Cheese
1/2 Cup butter stick
Tools Needed:
1 small microwavable bowl
spoon
Toppings
Cheese
Tomatoes
Lettuce
etc.
Tools Needed:
Cutting Board
Knife
Running Water
Sweet Potato Fries
Ingredients:
Sweet Potatoes
1 tbsp House Seasoning
1/2 tsp paprika
Tools Needed:
Cutting board
knife (crinkle knife makes prettier fries, but we don't have one)
baking pan
parchment paper (or foil if you don't have parchment paper)
This seems like a lot. But it really isn't. It didn't take a lot of time (except the bread, all bread takes time. not a lot of work, but a lot of waiting.) We'll start off with the bread and just move right along.
1. First, Chef Blackheart heated the butter, water, and sugar on the stove on low heat. Remove the mixture from heat just before the butter melts completely.
2. Mix all other dry ingredients (flour, salt, instant yeast, and onion powder.) Make sure you mix thoroughly. You should hear crunching while you are stirring in the yeast.
3. Add the butter/ water/ and sugar to the dry mixture
4. Beat for 30 seconds
5. Add the egg, beat for another 30 seconds
(If it's dry and flaky, add 1/4 cup of water and finish mixing by hand)
6. Mix until you've made a soft smooth dough
7. Place dough in a lightly greased bowl (He used olive oil.)
8. Cover the bowl with a clean towel.
9. Put in a warm draft free place. We normally place our bread in the turned off oven with a bowl of hot water underneath it.
10. Let it sit for an hour. The bread should have doubled in size. If it look like it hasn't moved. Throw it away. Go buy some bread from the bakery for tonight, and try again. Or try again, if you actually have time.
11. If it looks like it going somewhere, but you don't think it looks like enough, wait another 30 minutes, and then just go to the next step.
12. Divide the dough in to 8 equal parts. Chef Blackheart cut it with a knife, then shaped them into a flattened ball.
13. Place them on a greased baking pan, cover, and let them rise an additional 30-40 minutes
14. Pre-heat the oven to 375F
15. Bake the buns 12-15 minutes, until they are golden brown
16. Remove from the oven, and cool on a wire rack.
17. Split and use for burgers.
House Seasoning
Ingredients:
1 cup salt
1/4 cup black pepper
1/4 cup garlic powder
Tools Needed:
Plastic bag (small)
Sharpie
1. Put all the ingredients in the bag. Give to one of your children and let them shake it.
2. If you're child is old enough to write, have them put the date on it.
3. If there's any left, throw away six months from that date.
Blue Cheese Butter
Ingredients:
1/4 cup Blue Cheese
1/2 Cup butter stick
Tools Needed:
1 small microwavable bowl
spoon
1. Soften the butter in the microwave. I used 1 minute on half power and I completely melted the butter. 2. Mix in the blue cheese. 3. Give the bowl and spoon to any child willing to help. Give the child praise for helping! 4. The butter will begin to thicken. 5. Place the blue cheese butter in the fridge for at least 30 minutes to chill. 6. Once you're finished, place in a sealable container.
Burgers
Ingredients:
1 lb grass-fed ground beef
1tbs "House Seasoning" (salt, pepper, and garlic powder mixture)
1tsp paprika
Tools Needed:
Grill
Thermometer (optional)
1. Mix all ingredients together.
2. Make 4 flattened patties
3. Place on grill. We used a George Foreman Grill, well because it's the only kind of grill we have.
4. Flip on grill until brown on the outside. You can check the temp with a thermometer. 145F is about "medium rare." 165F is about "medium."
5. Place whatever kind of cheese you would like on the burgers
6. Remove from heat.
Toppings
Cheese
Tomatoes
Lettuce
etc.
Put it all together!
Sweet Potato Fries
Ingredients:
2 Sweet Potatoes
1 tbsp House Seasoning
1/2 tsp paprika
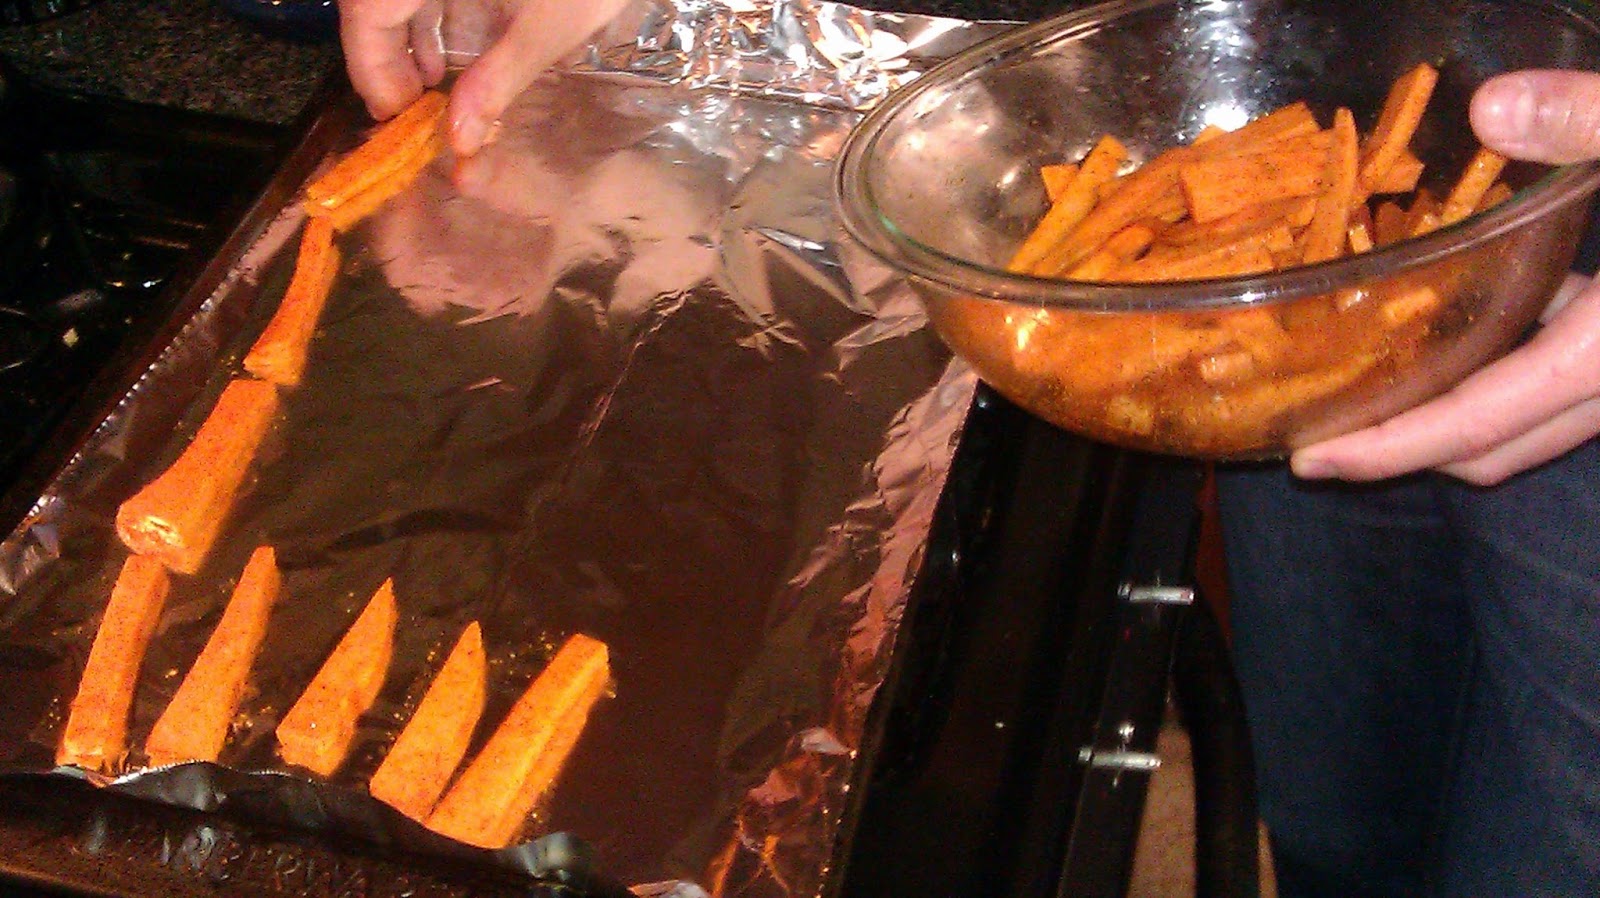
2 tbsp olive oil 1.Preheat oven to 450F 2. Wash and peel sweet potatoes
3. Cut sweet potatoes into 1/4" slices, then into 1/4" fries 4. Place the house seasoning, paprika, and olive oil into a bowl 5. Then add fries
6. You can let your kiddos mix with their hands. Be careful of the paprika. Make sure they wash their hands afterwards.
7. Place fries on cookie sheet with parchment paper. Make sure each fry has room
8. Bake for 20 minutes or golden brown, make sure to rotate occasionally. 9. Let fries cool slightly before serving.
The last three days have probably been our worst three days in a long long time. A quick example of our meals and snacks have been: pop tarts (how do we still have these in our pantry?), fig newtons, angel hair carbonara (leftovers from going out to eat with my mom, "Granny," ) "organic" cheese crackers (these things are horrible!), m&m's and fajita's at Mi Rancho. Go ahead and throw a couple of cane sugar dr.pepper's in there for good measure. And it been like this for three days. We even had James Coney Island today. There's nothing worse than canned cheese. I literally feel sick when I think about all the food I have consumed in the last three days. But I bought a new cookbook and we're getting back on track. At least I feel better about it all.
Here's our baking adventures this week...
First, I tried making sweet bread this last Sunday. I'm not putting the recipe, because it didn't work. If it does in the future, I'll post it.
Outside it looks amazing, but if you look inside, it didn't cook all the way through. *sighs*
So Chef Blackheart tried to make white bread. He thought I might need a break from the bread making duties.
Here is his first attempt.
Again, it looks good on the outside, but it didn't rise properly, and it was hard as a rock.
Then, Wednesday, Chef Blackheart surprised me with the most beautiful loaf of bread I've ever seen, and it tasted amazing!
So, what did we learned this week?
1. Sweet Bread was not meant to be made in large loaves. But in small rolls 2. When making bread with dry live yeast, stir the yeast well to make sure to break open the outer shell. 3. If your bread dough doesn't rise properly, throw it away and try again. No use in going further. It's not going to come out correctly. 4. You don't need a bread machine. 5. Try try try again, you'll get it and you'll be glad you did!
In my family, everyone knows what "home" food my step dad and Rose and Ryan's "Daddy Tom", misses most; Mema's chocolate cake. Now this is pretty much sheet cake, but with love. And Daddy Tom always gets a corner piece. This is also my favorite chocolate cake, but it MUST be eaten with BlueBell Homemade Vanilla Ice Cream! Yum, yum, yum! Chef Blackheart is also a big fan, so when he did well on his entrance exams for school, I told him I'd make chocolate cake. THIS IS NOT DIET FOOD, but it is made from scratch. It's also easy to mess up, so I'll walk through it step by step.
Ingredients:
Cake:
2 cups flour 2 cups sugar 1 tsp baking soda 1 cup water 1 cup butter (not salted) 1/4 cup cocoa 1/2 cup buttermilk 2 eggs (beaten) 1 tsp. vanilla
Icing:
1/2 cup butter 1/4 cup cocoa 6 tbsp milk 1 (16oz) powdered sugar (or 3 3/4 cups for those who buy in bulk) 1 tsp vanilla
What you need:
small sauce pan strong spoon two large bowls One small bowl 9 1/2"X 13" baking pan a mixer (or a strong arm for those whose mixer is broken or missing)
How to make:
1. Combine flour, sugar, and baking soda in a large bowl.
2. In the small pan, melt most of the butter on low heat.
3.Add water and and then mix the cocoa in the pan.
4. STIR FREQUENTLY!!! Do not burn the cocoa. Keep this in medium to low heat until it boils 5. Add the cocoa mixture SLOWLY to the flour mixture.
6. Add the Buttermilk, eggs (beaten) and the vanilla to the mixture.
7. Mix well. Place in a lightly greased pan. (I used a 9 1/2" by 13")
8. Bake for 30 minutes on 350F on the middle rack.
At this point, take a breath. And if you're me, run back through it and make sure you did everything correctly... then figure out you forgot to add the buttermilk. :) Did anyone else catch that in my picture? Please imagine me using children appropriate curse words such as dang, snap, fudge, as I quickly pull the cake out of the oven. Yes! I can still save it! I poured it back in the bowl with the help of Chef Blackheart and mixed in the buttermilk. Regreased the pan with olive oil, poured and threw it back in the oven. At that point I just crossed my fingers, washed a couple of bowls and the pan that I would need for the icing, and tried to smile.
And now the icing...
And since I hate having to scroll so much, here's the ingredients again:
1/2 cup butter
1/4 cup cocoa
6 tbsp 2% milk
1 box powdered sugar (or 3 3/4 cups)
1 tsp vanilla
1. Put butter in pan on low heat until it is mostly melted
2. Add milk and cocoa.
3. STIR and stir and stir some more. DO NOT BURN THE MIXTURE. It will stink, it's hard to clean out, and it doesn't make for good icing. I don't have any pictures of this step, because I was stirring.
4. Turn up the heat to medium low until it starts to simmer/ boil
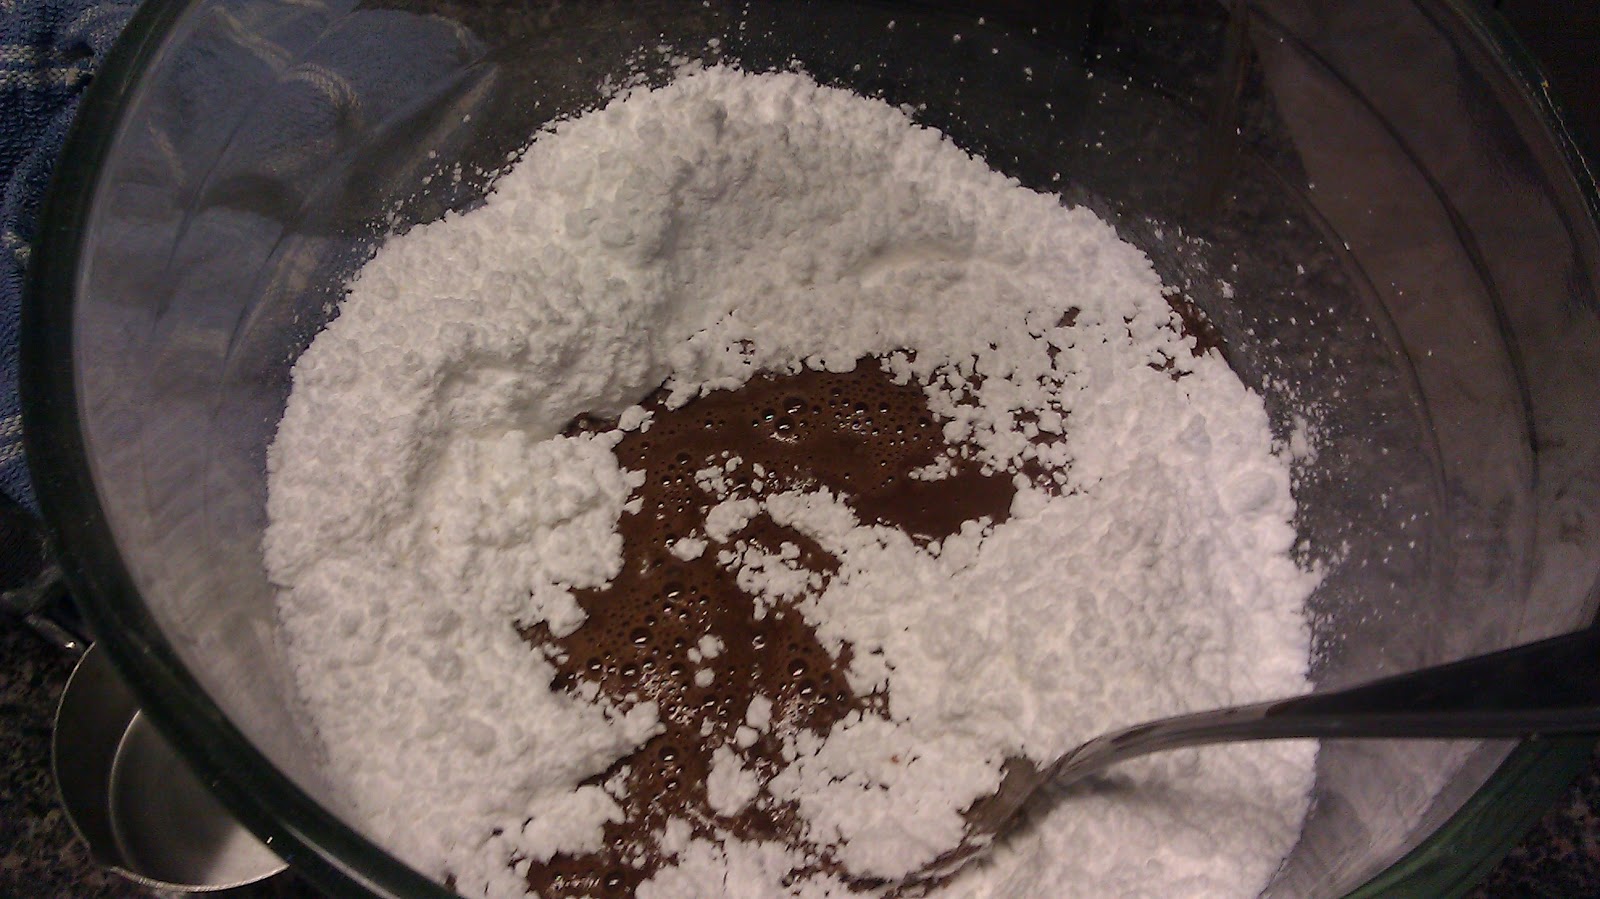
5. Pour the powdered sugar into a large mixing bowl.
6.Add the cocoa mixture to the bowl with the powdered sugar.
7. Hand mix the mixture until you get all the powdered sugar off the sides. Then beat with a mixer until smooth. I've done this plenty of times with no mixer, but the mixer is easier, and I'm trying to get my money's worth on that thing.
8. Add vanilla
Bring it all together
1. When the cake is done baking, remove and use a large fork to poke holes throughout the cake.
2. Pour the icing over the hot cake.
You should get something that looks like this...
Yuuuuuummmmmmmmm!
Cut some pieces, eat with vanilla ice cream or whipped cream.
Happy Ryan and Rose!!!
Good luck!
Sunday Morning Breakfast: Berries and Cream
This morning, Ms. Rose started slamming doors at 5am. Now Chef Blackheart got up and somehow got her to go back to sleep until 7:30am!!! Unheard of in our house. However, Ms. Ryan was up and ready to wine. Well who could blame her, I was in a pretty bad mood from being woken early Sunday morning with the loud crack of a slamming door. So, Ryan and I creep downstairs and I try to throw together a cup of milk for her and a pot of coffee for me. Next on the list, breakfast! What to make? Muffins? Pancakes? Eggs in toast? Berries and Cream!!! This is so easy, you can even do it half asleep and it's very hard to mess up.
What you'll need:
3-4 cups of berries (I used a pint of strawberries, 1/2 pkg of blackberries, 1/2 pkg of raspberries, and a hand full of blueberries) Cut the strawberries into bite size.
1 pint Heavy Whipping Cream 2 tsp of Vanilla extract 2 tbsp of table sugar
Utensils:
a knife and cutting board a whisk, preferably attached to a mixer for lazy people a medium sized mixing bowl a couple of small bowls or cups for serving
At first, I tried whisking the cream myself, but it was too early. I broke out the mixer with the whisk attachment. I placed the mixer on the lowest speed and let it thicken up. Once the cream got to be about sour cream consistency, I added the vanilla and sugar. Then I put the mixer on medium and let it go until the the cream made peaks that stayed when I quit stirring. This made it as thick as Cool Whip. I prefer cream that is about the thickness of yogurt, but whatever thickness you like best is fine. I just happen to let it get away from me. The girls loved it though. Just place cream and berries in container alternatively until the cup/ bowl is full. You can make this as pretty or as messy as you like. I made a pretty one to take a picture, but Chef Blackheart finished it off before I could take a picture. Dang...
Anyhow, Ryan had two bowls!. One bowl when I made it and another when her sister finally woke 2 hours later. I'll admit that Ryan liked the cream better than berries, but it's a little early for berries to be delicious.
Here's Ryan enjoying her Berries and Cream.
Saturday, March 3, 2012
Homemade pizza Dough and sauce were homemade. The cheese was fresh HEB handmade mozzarella And HEB Pepperoni.
The pepperoni made it a little geasy, but we've had a tomato one that was to die for!
Just a quick introduction of our family. First there's Chef Blackheart who's a stay at home daddy, a full time student, and a pretty awesome cook. I'm Jendy, an overworked lab worker, self proclaimed baker, and best of all, a mommy. We have two girls under the age of 3, Rose and Ryan. (It sounds better than saying we I have a one year old and a two year old.) We are your normal family. We work. We study. We run (for fun.) We play. But we LOVE to eat!
When our oldest first started eating, we'd "discuss" what was best to feed her. We'd talk about what was good for her, then we'd feed her something completely different. She drank nothing but juice. She ate sugary snacks and ice cream. We'd hit up Micky D's more than I'd like to admit. Every once in awhile we'd talk about eating better, and devote ourselves to healthy eating once again. But really it would only last for a week or two.
Then one day it just clicked. We started trying to cook things from scratch. Not from boxes that say they're healthy, not from cans, but from fresh fruits and veggies. The thing is, cooking prepackage healthy foods are just gross. And my kiddos WILL NOT eat them. So we haven't cut out yummy food, just cut out prepackaged and fast foods. And it's really not that hard to make things from scratch. Here's our journey of trying new recipes and raising two beautiful strong minded girls.